Adding Images

With the web-based software, you can add images from your own files like logos or customers’ logos on special projects with your cable labels.
Once you have your image in the work area you can spin, move, or make it smaller and bigger to fit the label you are working on.
The main area we use on cable labels is for customers’ logos and warning signs for cable, we try to use the main part of the label for the logo and the side of the top for the data and information on the cable labels.

Once you click the “ADD IMAGE” button a box will be in the print area.
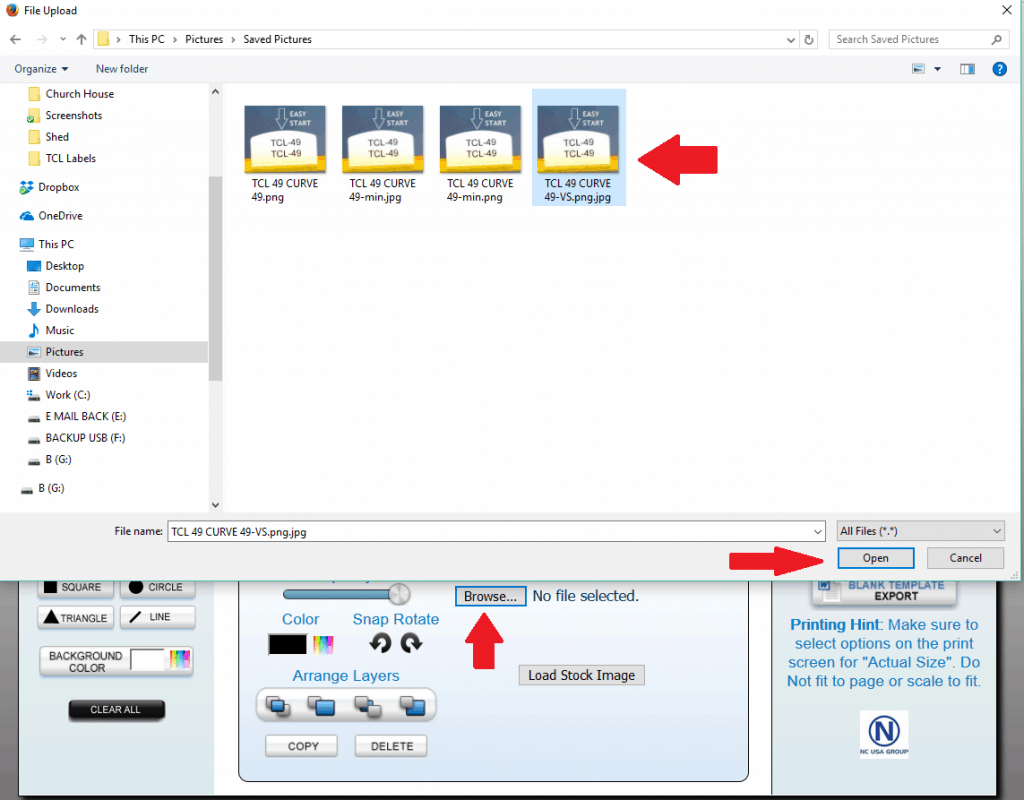
The image box will be the work area and you can upload the image to that box.
This image can be placed in any place on the cable label print area, remember that if you are using a very small cable label it will be hard to
You may also need to use a color laser printer to make the cable label look great with your logo.

Select the image you need from your location on your PC or device and open it to upload it into the cable label print area.
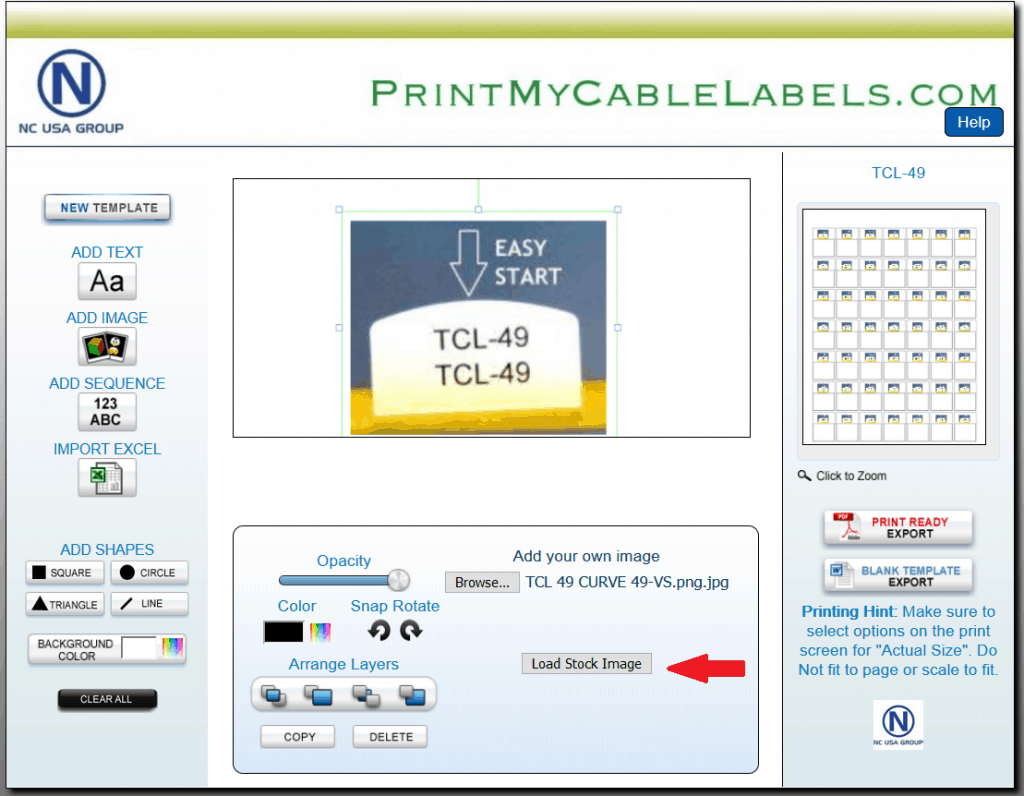
The image will auto-size to the image box which you can adjust at any time by dragging the corners and moving into the position you need.

At this point, your image should look like this and you will be able to adjust the size.
You may also load images from our stock images.
Click on the “Load Stock Image” button and a new pop-up menu will show, any one of these images can be added to the cable labels for many different uses.

Once you have your cable label looking right with the image you may add other features like adding text or a number sequence, even you can still import your data from an excel spreadsheet.
A color laser printer will be required for logos and warning signs that have many colors.
